Why Every Homeowner Should Know Basic Plumbing
Plumbing problems are one of the most common reasons homeowners call for service. A running toilet, a slow drain, a leaky faucet—these issues seem minor but they cost real money. The average plumber charges $45-$200 per hour, and that’s before parts and emergency fees. A simple faucet repair that takes 20 minutes can easily run $150-$300 with the service call included. If you’re dealing with a running toilet (one of the most common plumbing issues), check out our step-by-step guide to fixing a running toilet to save even more.
But here’s what most people don’t realize: most basic plumbing repairs aren’t complicated. They require a few simple tools, some basic knowledge, and the willingness to get your hands dirty. Once you understand how your home’s plumbing works, tasks that seemed intimidating become straightforward.
This guide gives you that foundation. By the end, you’ll understand your home’s water system, know which repairs are DIY-friendly, and have the confidence to handle the most common plumbing issues yourself.
Understanding Your Home’s Plumbing System
The Two Basic Systems
Your home has two separate plumbing systems that work together:
The supply system carries clean water under pressure from the main line into your home. This is why water sprays out of your faucets with such force. When a pipe bursts, the pressure makes the water go everywhere fast.
The drain system uses gravity to move wastewater away from your home. All the pipes in this system are slightly angled downward to let water flow naturally. The pipes are larger in diameter than supply pipes because they handle a lot more volume. You’ll hear this system called “DWV” (drain, waste, and vent).
The Three Main Components
Every home plumbing system has three essential components:
1. The Main Shutoff Valve
This is the most important valve in your home. It’s usually located where the main water line enters your house—often in the basement, crawlspace, or near the water heater. When a pipe bursts or you need to make major repairs, this valve stops all water flow into your home.
Know where it is before you need it. Print this on your emergency checklist: locate, test (turn it once a year to make sure it still works), and make sure it’s not blocked by stored items.
2. The Water Meter
Your water meter measures exactly how much water you use. It’s usually located in a box near the street. The meter has a shutoff valve before it (your municipal supply) and one after it (your home’s main shutoff). If you have a leak somewhere you can’t find, you can check the meter: turn off all water-using appliances, don’t flush toilets, and see if the meter is still running. If it is, you have a leak.
3. The P-Trap
That curved pipe under your sink is called a P-trap. That U-shape is intentional—it holds a small amount of water at all times, creating a seal that prevents sewer gases from coming up through your drains and into your home. If you smell sewage odors from a drain, the P-trap might be dry (run water for a few seconds) or it might have a problem.
Essential Plumbing Tools Every Homeowner Needs
You don’t need an elaborate toolkit for basic plumbing repairs. Here’s what belongs in your plumbing-specific tool collection:
The Must-Have Tools
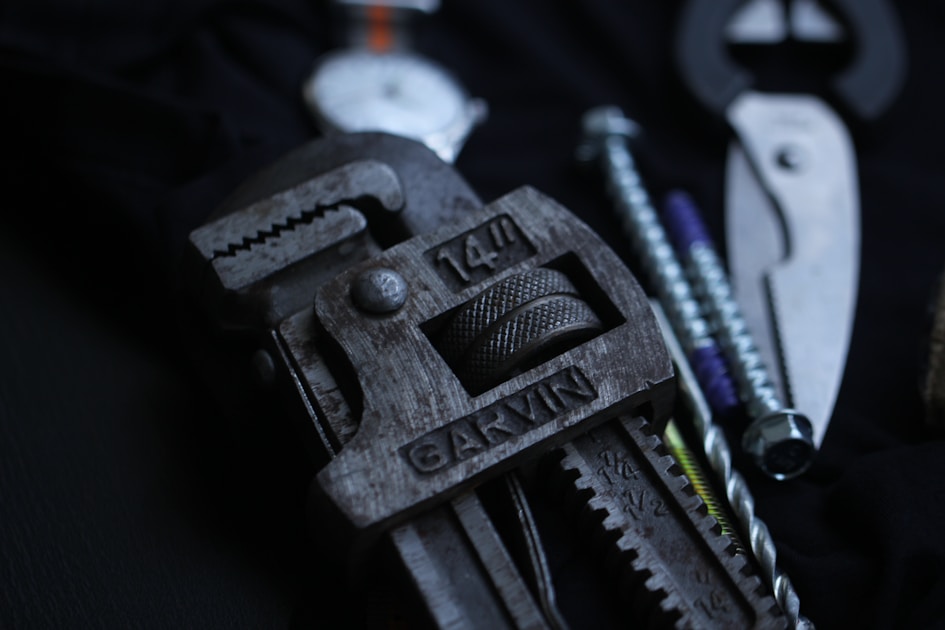
Adjustable wrenches (2 sizes)
An adjustable wrench lets you work on nuts and bolts of various sizes without needing a full socket set. For plumbing, you’ll want at least two—an 8-inch and a 12-inch. The 8-inch handles smaller nuts like supply line connectors; the 12-inch handles larger nuts like the ones on main shutoff valves.
Look for wrenches with smooth jaw movement and a secure adjustment. Cheap wrenches can slip while you’re applying pressure, rounding off the fastener.
Plunger
Not all plungers are created equal. The classic rubber cup plunger (for toilets, actually called a “flange plunger”) has an extra ring that creates a better seal in the toilet bowl. The flat cup plunger works better for sinks and showers. For a full home, get both.
The key to plunging isn’t brute force—it’s creating a seal and maintaining it. A few firm pushes and pulls often works better than vigorous splashing.
Drain snake (hand auger)
When a plunger won’t clear a clog, a drain snake is the next step. A basic 25-foot hand auger handles most household clogs. You feed the cable into the drain, crank the handle to break through the clog, then pull it back out.
For serious clogs, you can rent a power snake from a hardware store, but the hand version handles 90% of home drain issues.
Basin wrench
This specialized wrench has a long shaft with a pivoting jaw at the end—designed specifically for the hard-to-reach nuts that hold sink baskets in place. If you’ve ever tried to tighten a sink nut from under the sink with regular wrenches, you know why this tool exists.
Pipe tape (Teflon tape)
This thin white tape creates a watertight seal on threaded pipe connections. Wrap it clockwise around the threads (the same direction the fitting will tighten) for leak-free connections. You’ll use this on almost every threaded connection you make.
Plumber’s putty
A soft, moldable sealing compound used to create watertight seals around drains, basket strainers, and faucet bases. Unlike Teflon tape (which goes on threads), plumber’s putty fills gaps and creates a seal on flat surfaces. It stays soft for a long time but eventually hardens.
The Nice-to-Have Tools
- Tongue-and-groove pliers (Channel Locks)—extra gripping power for odd-shaped fittings
- Pipe cutter—for clean cuts on copper pipe if you do soldered repairs
- Hacksaw—cuts through metal and plastic pipe
- Propane torch—for sweating (soldering) copper pipe joints
- Bucket—always have one nearby; water surprises happen
- Flashlight/headlamp—you’ll be working in dark spaces under sinks and behind toilets
The Five Most Common Plumbing Problems (And How to Fix Them)
1. Running Toilet
A running toilet is more than annoying—it wastes up to 200 gallons of water per day. That’s not a typo. If your water bill suddenly spiked, a running toilet is a prime suspect.
The most common causes, in order of frequency:
Faulty flapper: The rubber flapper inside your tank creates the seal that lets water sit until you flush. Over time, it degrades, warps, or doesn’t seat properly anymore. Replacement flappers cost $5-$15 and take 10 minutes to install. This fixes about 80% of running toilets.
Float problems: The float controls how high the water level rises in your tank. If it’s set too high, water spills into the overflow tube. If it’s cracked and taking on water, it sits too low. Adjusting or replacing the float is usually $10-$20 and takes 15-20 minutes.
Fill valve issues: The fill valve controls water flow into the tank after a flush. When it fails, you get either continuous running or a weak, slow-filling tank. Replacement fill valves run $15-$35 and take 30 minutes.
How to diagnose: Remove the tank lid and watch what happens after a flush. Is the water rising above the overflow tube? Is the flapper sealing properly? Do you hear a continuous hiss? Each symptom points to a different cause.
2. Slow or Clogged Drains
Slow drains are progressive. A drain that works fine today will be completely clogged six months from now if you ignore the early warning signs. Address slow drains early.
The graduated approach:
Step 1 — Boiling water: For minor slowdowns (especially in bathroom sinks where soap scum is the main culprit), boiling water poured directly into the drain can dissolve the buildup. Do this a few times over several minutes.
Step 2 — Plunging: Create a tight seal and plunge vigorously 15-20 times. For double-basin sinks, block the other drain with a wet rag first so you don’t lose pressure.
Step 3 — Baking soda and vinegar: Pour half a cup of baking soda down the drain, followed by half a cup of white vinegar. Let it fizz for 30 minutes, then flush with boiling water. This is gentler than chemical cleaners and works for organic buildup.
Step 4 — Remove and clean the P-trap: Place a bucket under the P-trap, unscrew the slip nuts, and remove the trap. Clean out all debris, then reassemble. This is often the fastest solution for sink clogs.
Step 5 — Use a drain snake: Feed the snake into the drain until you hit resistance, then crank to break through the clog. Pull the cable back out slowly, wiping it clean as you go.
What NOT to use: Chemical drain cleaners. They work sometimes, but the caustic chemicals can damage older pipes, harm your hands and eyes, and create dangerous fumes. They’re a last resort, not a first step.
3. Leaky Faucets
A dripping faucet isn’t just annoying—it can waste 3,000 gallons per year according to the EPA. Fix it promptly.
Most faucet leaks come from one of two causes:
Worn-out washer: At the base of the handle stem, a small rubber washer creates the seal that stops water flow. This washer degrades over time, causing drips. Replacing it costs pennies and takes 15 minutes, but you need to disassemble the faucet to get to it.
Corroded valve seat: The valve seat is the connection point between the faucet and the spout. If it corrodes or accumulates mineral deposits, you get dripping even with a new washer.
The repair process:
- Turn off the water supply valves under the sink
- Remove the faucet handle (usually a decorative cap hides the screw)
- Remove the packing nut and stem
- Replace the washer at the bottom of the stem
- Check the valve seat—if it’s corroded, either replace it or the entire stem
- Reassemble and test
For compression faucets (the old two-handle types), washers are the universal fix. For cartridge, ball, or ceramic-disk faucets (more common in newer homes), you may need brand-specific replacement parts.
4. Low Water Pressure
Low water pressure makes everyday tasks frustrating. Showers become sad trickles; filling a pot takes forever.
The causes fall into several categories:
Clogged aerator: The aerator is the screen at the tip of your faucet. Over time, mineral deposits from hard water restrict flow. Unscrew the aerator, clean out the screen, and soak it in vinegar for a few hours. This is the #1 cause of sudden low pressure at a single faucet.
Partially closed valves: Check the shutoff valves under your sink (or at your water heater). If they’re not fully open, that restricts flow. Turn them counterclockwise to open fully.
Leaking pipes: If you have low pressure throughout the house and no obvious cause, you might have a hidden leak. Check your water meter with all water off: if it’s still running, you have a leak somewhere.
Water heater issues: If pressure is fine everywhere except the hot water side, your water heater might have a problem. Check the shutoff valve, the pressure relief valve, or sediment buildup in the tank.
Municipal supply issues: Sometimes low pressure comes from the city. Check with neighbors to see if they’re experiencing the same issue. If the city is the cause, a pressure-boosting system might be worth considering.
5. Frozen Pipes
In cold climates, frozen pipes are a serious concern. When water freezes, it expands—and that expansion can burst pipes, causing major flooding when they thaw.
Prevention:
- Insulate pipes in unheated areas (basements, crawlspaces, garages, exterior walls)
- Keep cabinet doors open under sinks on extremely cold nights to let warm air circulate
- Let cold water drip from faucets connected to exposed pipes during freeze warnings
- Disconnect garden hoses from exterior faucets before winter
If a pipe freezes:
- Turn off the main shutoff valve immediately
- Open the faucet connected to the frozen pipe
- Thaw the pipe with a hair dryer, heat gun, or towels soaked in hot water (start from the faucet and work backward)
- Never use an open flame to thaw pipes
- Check for cracks or leaks once you get water flowing again
Preventive Maintenance: Preventing Problems Before They Happen
The cheapest plumbing repair is the one you never have to make. A few simple maintenance tasks can prevent most common plumbing problems.
Monthly Tasks
- Check for visible leaks: Look under all sinks, around toilets, near the water heater. Catching a small leak early prevents major water damage later.
- Test water pressure: Use a pressure gauge on an outdoor faucet. Normal residential pressure is 40-80 PSI. Above 80 PSI stresses your pipes and appliances.
- Clean aerators and showerheads: Remove and soak in vinegar to prevent mineral buildup.
Quarterly Tasks
- Inspect visible pipes: Look for rust, corrosion, moisture, or mineral deposits that might indicate problems.
- Test shutoff valves: Turn each valve (under sinks, at toilets, at the water heater) fully off and then back on. Valves that haven’t been used can seize up and fail when you need them most.
- Flush your water heater: Attach a garden hose to the drain valve at the bottom, run it outside or to a floor drain, and open the valve for a few minutes to flush out sediment.
Annual Tasks
- Inspect the water heater: Check the pressure relief valve, anode rod (for tank heaters), and overall condition.
- Check for slow leaks: Look at your water meter with all water off. Any movement indicates a leak somewhere.
- Inspect and clean sump pump (if you have one): Test it by pouring water into the pit. It should activate and pump the water out.
- Winterize exterior faucets: If you live in a cold climate, disconnect hoses and install faucet covers.
When to Call a Professional Plumber
DIY plumbing can save you significant money and is genuinely satisfying for most common repairs. But know your limits. Some jobs require a licensed professional.
Call a plumber for:
- Gas line work: Gas leaks are life-threatening. Never attempt gas pipe repairs. Ever.
- Sewer line issues: Main sewer line clogs or backups usually require professional equipment and expertise.
- Water heater replacement: Unless you’re very experienced, the complexity and safety concerns (scalding water, pressure buildup) make this a pro job.
- Major pipe installation: Running new supply lines or modifying drain systems requires knowledge of codes and proper slope calculations.
- Persistent low pressure throughout the house: This often indicates hidden leaks or municipal supply issues that need professional diagnosis.
- Any flooding: If water is actively flooding your home, turn off the main shutoff and call for help immediately.
When in doubt: If you’re not completely confident in your ability to complete a repair safely and correctly, hire a professional. The cost of a service call is always less than the cost of water damage from a failed DIY repair.
Understanding Plumbing Emergencies
Some situations can’t wait for a scheduled appointment. Know what constitutes a plumbing emergency and how to respond.
How to Respond to a Pipe Burst
- Shut off the main water valve immediately. This is why knowing where your main shutoff is located before an emergency happens.
- Open all faucets to drain the remaining water in the pipes.
- Turn off the water heater (if applicable) to prevent damage to the heating element.
- Identify the burst location if possible. Often, the visible water isn’t coming from the actual break—it’s traveling along the pipe until it finds an exit point.
- Call a plumber. Pipe bursts usually require professional repair.
- Start water damage mitigation if water has reached walls, floors, or valuable items.
How to Handle a Sewer Backup
Sewer backups are nasty and pose health risks. If you have sewage coming into your home:
- Don’t use any water. Anything you send down the drain will add to the problem.
- Evacuate affected areas. Sewage contains harmful bacteria.
- Call a plumber who specializes in drain and sewer work.
- Contact your insurance company—sewer backups are often covered under separate rider policies.
Conclusion: Your Plumbing Confidence
Basic plumbing knowledge is one of the most valuable DIY skills a homeowner can develop. The repairs are straightforward, the tools are inexpensive, and the money you save compounds over time. Most people pay hundreds of dollars per year in plumber fees for issues they could have fixed in minutes.
Start with the easy repairs—a leaky faucet here, a running toilet there. Build your confidence and your tool collection gradually. Before you know it, problems that used to make you reach for the phone make you reach for your wrench instead.
Your home’s plumbing system doesn’t have to be mysterious or intimidating. Once you understand how it works, you have the power to maintain it, repair it, and improve it on your own terms.